Monday, April 30, 2012

Growing is FUN

I am a mother to a beautiful daughter who is inquisitive and loves to explore.  I include her in everything I do around the house and love teaching her new things.  I am a firm believer in keeping kids involved and treating them like they are smart enough to do important things too.  They will live up to your standards you set for them. 
Gardening is a fun and easy starter family project.  It's relatively cheap, especially when you use seeds like me.  However, the best part about gardening is, it happens to be really fun :) 

Bella was only one year old when we started our adorable garden.  She was a good helper even at such a young age.  She was interested in helping Mommy plant some seeds, so I took off her shoes and set her right in the dirt.  She dug right in and began nourishing her love of gardening. 


She would walk out to the garden everyday and help me water the plants or pick fresh produce.  Think about all the wonderful things she was learning about our food and where it comes from.  She really respects living things and is so cute making sure her friends are careful around her flowers. 

Check out some pictures of our grand opening this year (2012)


Check out her gardening tools and bag. 


Prepping the soil for new seeds. 


She was trying to do exactly what I was doing.  She is my little "helper" and I love having her here to share these memories with.  Sure it would be so much easier to wait until she takes a nap but why rush and rob her of that fun experience?  This is something that she will always look forward to doing together. 

After we got the ground ready for seeds, we had to organize the layout and make sure everything had plenty of room.  By the way, my raised garden was purchased at Sam's Club but they are everywhere now.  The product is made of recycled materials and is very reasonably priced.  It's easier to make a raised garden and keep it clean.  It's also easier to access when it's at a raised level.  We actually stacked two on top each other and made a taller setup.  This garden doesn't look very big but it sure does produce enough for our little family. 


Then, we had to make labels for all our veggies and herbs.  This year we used Popsicle sticks but next year I will use something larger so she can decorate them herself.  She's just a little too young to keep her attention long enough to decorate ten sticks. Paint sticks are the perfect size to make each label unique and colorful.  My pop sticks are different colors coordinating with veggies or herbs and my lettuce!!!! 


After everything has it's place, it's time to start planting.  Bella was waiting patiently for this moment and loved planting the seeds all by herself. 


She was so careful and showed great fine motor skills.  Like I said before, they learn so much just by playing in the dirt.


Precious:)  It's moments like these that really make me appreciate the little things. 

After everything was done and ready to go, we stood back and admired our work.  We were sooo Proud!

I will keep posting on produce and fun, simple recipes. 

Monday, April 23, 2012

I LOVE THOSE CURTAINS

Last week, I wrote about my dining room.  I made a claim that my decorations are simple, cheap and create large outcomes.  I probably get the most comments on my dining room door curtains.  It's kind of funny because I just throw up fabric that I find on sale and even table clothes. 
It all started with those old fashion curtain hangers that are tiny clips.  You can find them at any general store.  I got mine from Walmart (not a suprise) and they were only a few dollars.  I even got lucky and found the aged bronze color which matches the rest of my kitchen hardware and decor.  Then, I ran to the fabric store in search for cheap fabric.  My first set was an adorable owl pattern for Halloween.  Bella loves owls and she helped me pick it out.
After I found my fabric, I just hemmed the edges and clipped it on the rod with those tiny clips.  Here is a photo of my Spring fabric.  It has chicks on it to get us out of the Winter weather funk and ready for nice Spring activities. 


I am really proud of my Summer fabric (just put it up) because it's designer fabric that I found on clearance.  It matches my kitchen and dining room perfectly. 


I don't have a good picture right now but my Christmas curtains are actually table clothes that I just clipped up.  They were super cheap (maybe $5.00) each and I bought two.  This is a great secret, there are no rules.  You can use anything that matches your space.  Don't be afraid to look at discount stores and get a good deal. 

I love how simple and easy this is to change out and have for year after year.  It's not much to pack up and keep for all the different holidays.  If you're like me, you get bored of the same old thing.  I need change and this is just enough to satisify my project itch!!!!

Tuesday, April 17, 2012

*Tutu too FUN*

Okay, let me first begin by apologizing for not making this blog about my curtains.  I mentioned in my last post that I would be discussing that in the following post (next week).  I am still planning on doing that but have gotten several requests for bow and tutu tutorials.  So, I am doing a BONUS post this week to keep my followers (hopefully there's a few out there..hehe) happy!!!  If there is anything you are wanting to learn more about please message me and I would be happy to make a special post. 
Well, this is all possible through a good friend, Jessica Dimitro.  She was wanting to make some tutus and bows for her gorgeous little lady.  These bows and tutus pictured below were made together while she learned the basics.  She was kind enough to allow me to take pictures so I can teach you too. 

We will begin with the tutus because I have found it's easier to base the bow off the tutu after it's made and you can see the outcome.  The bows are much easier and less time consuming so those are better to change last minute when you have a better idea of what the entire outfit will look like. 

My bows are all made with that really popular and soft material that is stretchy or a soft headband.  I never want to do anything too tight that would maybe leave a mark on my baby's head.  I find mine at Walmart near all the headbands, bobby pins and hair accessories.  You can also find them at Hobby Lobby and Michaels.  You will see the different types in the pictures below.  You can get a bunch of them for only a few bucks or even order in bulk online for very cheap.  Next, you will choose the flower.  I like to get colorful flowers and the bigger the better.  You can find floral sales at the craft stores and get some beautiful flowers for a reasonable price.  Take the flower apart and separate the plastic from the silk flower.  You only want the soft fabric pieces. 

Then, you get to choose a fun button that matches the headband or even a cute rhinestone to place in the middle of the flower.  Glue the button/rhinestone first to the top of the flower and then glue the flower to your headband.  Be careful if you're using those holey ones that aren't solid.  I've burned myself too many times. ha


Stay tuned, I'll show you how to make the matching tutu. 

So to begin the tutu you want to choose your tulle color.  I like buying those spools because it's the perfect amount and great width.  You just cut your strips and then begin tying knots. 


Depending on low little your Princess is, you will determine your length.  Check the length you like and double it because we are tying it around the elastic.  To make the waistband, you just measure your the waistline (I just eyeball it with the elastic around her waist) and cut your elastic to fit.  You want it to be just a hair smaller than the actual waist because remember it's elastic and stretches.  I just love hot glue and use it constantly.  I hot glue the elastic together and begin tying the strips around it. 


This is kind of hard to explain so try to remain patient with me.  Take your tulle and fold it in half.  Take the loop (very center of tulle) and bend it over the elastic.  Feed the other end of tulle (two ends) through the loop and pull tight.  The tighter it is, the cleaner it will look.  If you leave it loose it may begin coming apart.  You will see the end product and have a better idea of what I'm talking about.  I also like adding different ribbon and/or yarn to add a little texture and another dimension.  It makes it look a little unique too. 


If you're adding ribbon or in this case, yarn, you will just tie it on like the tulle.  Now for bows or ribbon at the top of the tutu.  This is a great opportunity to add a splash of color or make it look even more fancy.  This bow is attached with Velcro.  How ingenious is that?  My neighbor Donna Pieber is to thank for this.  She made a tutu for her granddaughter and used this idea.  Now, this versatile skirt can be changed to look totally different with a change of a bow.  Again, just hot glue the Velcro onto the tutu and then on each bow that may be attached. Watch your female and male pieces.  All the bows will be one and only the tutu is the other.  If you like the tutus with the ribbon around the top, that can be done two different ways.  I either feed it under each tied piece and the elastic band.  You can also wind the ribbon around the top and end with making a big bow in the center.  I have pictures below of both methods.  The nice thing about making these is it's all trial and error.  Everything can be undone and redone. 

 Here is the same skirt with a yellow bow. 


Now check out these other skirts we did.  They are fun and just as easy to make. 

I know these look daunting but once you do it one time, it's so easy to repeat.  Follow these simple steps and write in with questions.  I would love to clarify something for you. 

Sunday, April 15, 2012

Where did you get that?

When I started thinking about beginning my blog, I remembered all the times my friends would come over and ask how I decorated my house.  Now, I don't live in an enormous house, in fact it's very tiny but I love the size and how everyone comments on its coziness. 
I wanted to begin explaining how I decorated my house because everything is cheap and simple.  I'm a creative person but honestly once I show you how easy it is, you will look like a decorating DIVA:) 
I need to describe my style.  I am a country girl at heart and love the good ole days.  My decorating is never fancy or expensive.  I actually get really tickled when I find something on sale or super cheap.  I am usually caught bragging about how good of a deal I got as oppose to how expensive something might be.  I LIVE in my home and I know y'all think that sounds kind of silly but I believe that a home should be practical and add memories for your family.  I never buy anything that I would be too upset if it got a nasty mark in it or even worse, broke.  Typically my decorations can be used and are somehow made myself. 

I will begin today with my dining room.  Again, I have a small home so this dining room is actually in my kitchen.  hehe  I said before and I really truly live by it, my home helps us make memories. I use the opportunity every season offers to change the decorations and get excited about the events to come.  My large chalkboard inspired by Sarah Bommarito is one of my favorite ways to shout upcoming holidays or seasons. 


You might remember this from my last post about Bella's 2nd birthday.  We even used it to explain to Bella how old she is and the number 2. 

I change it with Bella's handy sidewalk chalk and use different colors.  I found the chalkboard print from Hobby Lobby under $20 and just stuck it to a thick cardboard from Walmart.  This is where you could get creative and use a different color background to match your decor.  I found a large frame (also at Hobby Lobby on sale) and hung it on the wall.  Now, the new popular way to hang picture frames is from ribbon and a fun, bulky nob (drawer pull and/or hook).  I chose a red rooster to match the rest of my kitchen.  The picture frame is rather heavy so I secured that first and then added the ribbon later. 
Now, every holiday or even small event, I find new quotes and sayings to add to the fun decorations!!!  I find myself looking at church boards and other forms of media where they have interesting quotes.  Here are some more pictures of other sayings I had recently: 


I also get a lot of compliments on my Creative Memories Board.  Thanks to my friend, Robin Hall, she was able to hook me up with her Creative Memories Consultant.  I saw it first at Robin's house several years ago and had to have one myself.  It's a magnetic board with small magnets and an adorable picture line to hang photos on.  I use my scrapbook paper for the background and switch up the photos to coordinate with my different decorations as well.  It's about $50 but totally worth it when you think about the easy "instant" decoration you have that can be used all year round.  I love mine and would love to hook you up with the consultant I know!!!!


The last big part of my dining room that I love is the large, white China Hutch.  I am sooo proud of that piece of furniture and it would probably be the first thing I tell you abut when you walk in my home.  I found it at Goodwill for only $60.  Can you believe it?  I was so tickled and couldn't believe I was legally taking it home for so little.  My wonderful husband helped me paint it and put on new hardware.  After just a few days, I doubled my storage in my kitchen and had a nice way to display my dishes and entertaining pieces.  I don't have much storage (again, small house) but this piece of furniture is practical and adorable.  I love using it to change the feel of the room for each holiday!!!  Check out this picture of Bella and me on Thanksgiving.  If you look behind us you can see my chalkboard and magnetic board all ready for Turkey Day!!!


Next week I'm going to explain my curtains and how they are also easy changes that make big outcomes when decorating!!!!

Sunday, March 25, 2012

Whooo's turning TWO?

My daughter Bella just turned two last week and I threw a party for her incorporating OWLS into the theme.  I am a stay-at-home Momma and am always trying to save money where it's at all possible.  I literally spent less than $20 on all the decorations and cupcakes.  It helps that I have a large collection of fabric and craft supplies at my disposal but maybe I can show you even more ways to utilize what you have around the house and save a few bucks at your next party or get together! 

I think the first thing I thought of was decorations.  I knew it was going to have something to do with owls but, what kind?  Should I break out the typical streamers and balloons?  Maybe buy some owl centerpieces from the party store?  Well, I admittedly went down to the local party store and they unfortunately (turned out to be such a blessing) didn't have anything owl.  So, it was completely up to me to create something that was perfect for the birthday girl and all her adorable guests.  I started looking at all the fabric I had and considered making some decorative pillows to set on the tables.  Then, it hit me....I would make enough pillows to decorate all the tables and every child can take home as their party favor.  Genius, no loading them up on candy and sending them off on a sugar high yet, something unique and exciting for each party guest.  I ran out of stuffing so tore apart a couple pillows (great excuse to buy new fluffy ones), went through my button collection, and choose vibrant felt colors for the different features making each owl cute in his/her own little way:) 


Another form of decoration is the CAKE!!!  I like the idea of cupcakes for little ones because they are so easy to grab and go.  I did a little snooping on PINTEREST and after looking at different ideas, I made my own version of individual owl cupcakes and one large owl made of several cupcakes.  The cupcakes were delicious and fun to eat.  The kids loved pulling all the fun treats off and getting their own little piece of cake to enjoy!!


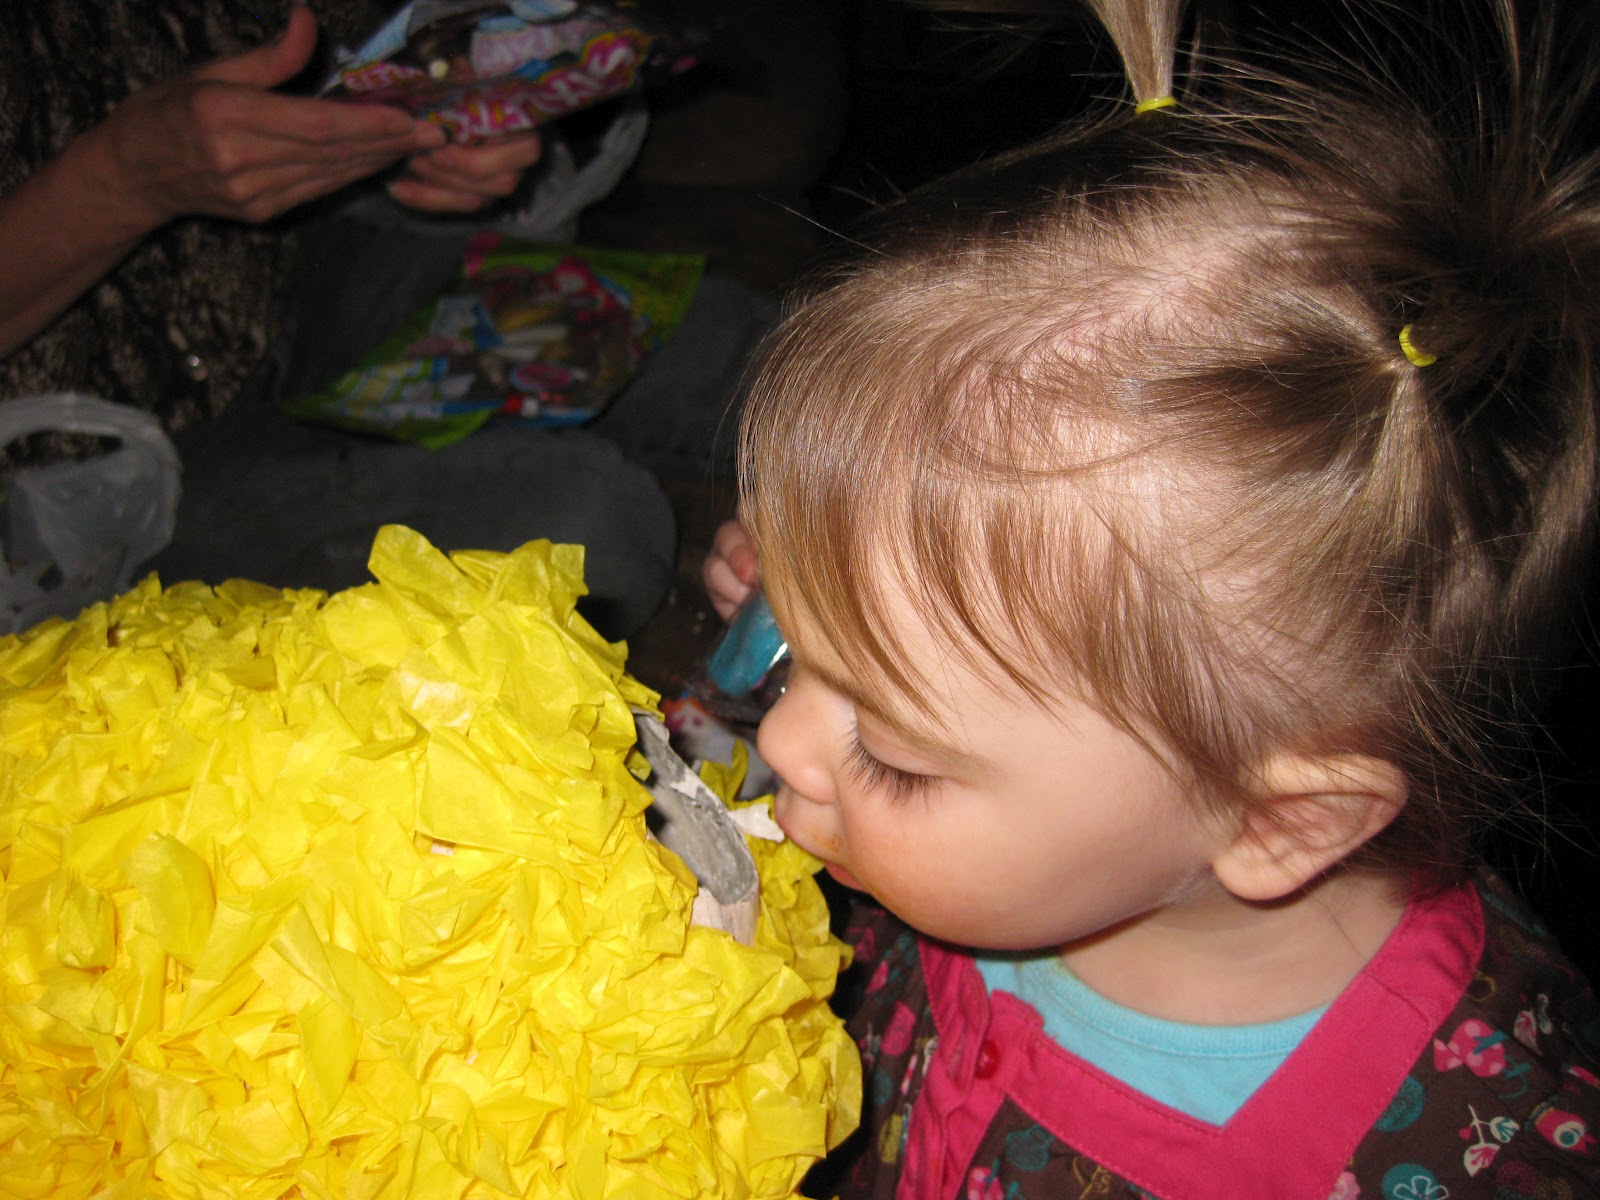
After I had the decorations under control, I thought about activities and keeping the kiddos entertained.  Every party has to have a pinata right?  Again, I went to the local party store and had no luck finding a pinata with an owl or even remotely owl themed.  I did see a large ice cream cone (which works because her party was at the ice cream shop) but it was ridiculous...$35.00.  That's not even stuffed.  Seriously?  So, again it was up to me to make my own.  I remembered the days of elementarty school with paper mache and balloons forming planets or face masks.  I had my sweet daughter helping and that was fun for all of two minutes.  Then, it became a large mess.  I still like the idea of making her a part of all the fun projects I'm doing but I will do it outside next time:)  Anyway, you begin with just water and flour.  Keep mixing until it's at the consistency you are comfortable with.  You want it to be thick but not too thick because it will be smooth and go further if it's more liquid-like and not paste-like.  Choose a ballon for the base form.  A balloon is nice to use because you just pop it when everything is dry and hard. 


Don't worry if your base form doesn't look like the final product.  It's easy to add features later to create your final masterpiece.  After it is dry, it's time to add the tissue paper.  Tissue paper is so cheap and so far I've just used recycled newspaper and flour which I had at the house.  I even used the tissue paper I had leftover after a gift wrap.  Christopher brought home one more pack of yellow (body color) which was $1.00.  Pretty good deal for a one-of-a-kind pinata.  Once you have decided the body design and what colors you will use it's simple.  Cut the tissue paper into smaller squares and scrunch them one at a time and glue onto the form.  This seems like such a long process but I promise it goes by fast.  I used good ole Elmer's glue which worked great.  Relax on the couch after you put the kiddos to bed and watch some saved up DVR shows while you finish glue the pieces on.  I don't even think it took one glass of wine's time.  hehe  Like my time measurement? 


Once the tissue paper is on, it really looks awesome.  Then, you just add the extra parts with paper or in my case, the wings were paper bags covered with the tissue paper.  For the top, we just drilled (when I say we, I really mean my wonderful hubby, Christopher) two holes in the top and thread some black string through.  I used one of those curved needles but I'm sure you could use any wire you have around the house.  Then, the fun part is deciding what you want to put in it.  My Mom really wanted to stuff the pinata for her granddaughter so she went to the dollar store with us and was kind enough to pick up the bill.  We brought all the goodies home and Bella was excited to help us stuff as well.  It was a fun time had by all. 


Don't get stuck in a "candy only" rutt either.  Don't be afraid to get creative.  We put pencils in there, toy watches, balls, etc.  To close it up, I cut a piece of that recycled brown paper bag and glued it really well from the inside.  It was really heavy after filled so be sure to secure the opening well.  Then, cover it with tissue paper to keep it secure.  Check out the final product! 


It was quite a hardy pinata too.  The two year olds couldn't bust it.  My cousin's little girl knocked it down but I still had to pull it apart:)  We were using a plasstic bat.  May need to use a wooden bat next time:)  

Alright, we have the pinata and we know wonderful things will be coming out of it but how will the kids collect it?  Should I use the plastic party bags from the store?  No, cheapo here designed her own brown paper lunch sacks (had at home already = free) and made it again part of the theme. 

I HAD A HOOT AND GOT SOME LOOT AT BELLA'S 2ND BIRTHDAY


The best part of all this party planning is not only that is was cheap and fun but I was able to make it all ahead of time and just show up the day of the party ready to have a blast. 

Another fun activity to keep all the kids feeling like they are part of the party fun was to make owl hats.  This was a fun activity to do for the party and everyone got to wear their own creation too.  Everyone looked like an owl that day.  It was lots of fun and something else unique to Bella's party.  Kids love wearing hats and looking silly so this was perfect for the six two year olds there:) 


The concept was easy, foam visors and adhesive foam pieces for easy decorating.  They even got to choose their own color hat. Most of the kids were even wearing them home as they left the party.  Whoooo doesn't want an owl hat?  Hehe I know I'm a dork. 


Decorations?  DONE
Cake?  DONE
Activities? DONE
The last thing I had on my birthday agenda was the birthday girl's fabulous outfit.  Bella is only two but for every party she has, I have made a special outfit just for her.  I made a shirt with felt that I cut and glued (fabric glue) on and a fabric tutu skirt.  The skirt was easy to make.  I didn't even have to sew anything.  You just take an elastic band and glue it at the appropriate length, cut strips of fabric (I even coordinated her skirt with the owls I made for the party) and tie them in knots around the elastic band.  The weekend of the party was quite a bit warmer than it had been leading up to that day.  So, I bought a turtle necked shirt which I just altered the night before.  Again, it was simple.  Just cut the sleeve at the length you like and sew a simple hem around the edge.  Top off every outfit with a nice pair of boots and you've got a great party dress:) 


We held her party at an ice cream parlor.  It was PERFECT for a two year old.  They got to pick their own special bowl, ice cream and even yummy toppings.  There were six two year olds but honestly they were all sooo sweet and appreciative.  Nobody got upset, there were no big fits and everyone was smiling and having fun.  I think we kept them too busy and occupied with all the activities and SUGAR:) 


Saturday, March 24, 2012

3 2 1.....BLAST OFF

Well, here I go.  I am embarking into the popular life of a blogger.  Recently, I have taken a close friend to register for her baby shower.  After finishing the entire process, explaining in great detail all the things that she will/will not need for her little bundle of joy and being careful not to make every choice for her; we checked the clock and it took about 45 minutes total.  I know you're probably thinking big deal.  I was too but she made it clear to me that I have a gift and it would be wrong not to share it with the world.  I am planning on blogging about saving money, cleaning, maintaining a home, caring for a family and teaching young children through fun activities and love. 
I am blessed to have the opportunity to stay home with my beautiful daughter.  My husband is my hero and I thank God everyday for his support and devotion.  I have my Masters in Education and am pretty creative.  Meanshow I stay at home, I am always looking for a good deal and not afraid to work for it.  I love helping others and this was a great way for me to do so without sounding too bossy.  hehe 
Please feel free to comment, make suggestions and spread the word that I am here!