I think the first thing I thought of was decorations. I knew it was going to have something to do with owls but, what kind? Should I break out the typical streamers and balloons? Maybe buy some owl centerpieces from the party store? Well, I admittedly went down to the local party store and they unfortunately (turned out to be such a blessing) didn't have anything owl. So, it was completely up to me to create something that was perfect for the birthday girl and all her adorable guests. I started looking at all the fabric I had and considered making some decorative pillows to set on the tables. Then, it hit me....I would make enough pillows to decorate all the tables and every child can take home as their party favor. Genius, no loading them up on candy and sending them off on a sugar high yet, something unique and exciting for each party guest. I ran out of stuffing so tore apart a couple pillows (great excuse to buy new fluffy ones), went through my button collection, and choose vibrant felt colors for the different features making each owl cute in his/her own little way:)

Another form of decoration is the CAKE!!! I like the idea of cupcakes for little ones because they are so easy to grab and go. I did a little snooping on PINTEREST and after looking at different ideas, I made my own version of individual owl cupcakes and one large owl made of several cupcakes. The cupcakes were delicious and fun to eat. The kids loved pulling all the fun treats off and getting their own little piece of cake to enjoy!!

After I had the decorations under control, I thought about activities and keeping the kiddos entertained. Every party has to have a pinata right? Again, I went to the local party store and had no luck finding a pinata with an owl or even remotely owl themed. I did see a large ice cream cone (which works because her party was at the ice cream shop) but it was ridiculous...$35.00. That's not even stuffed. Seriously? So, again it was up to me to make my own. I remembered the days of elementarty school with paper mache and balloons forming planets or face masks. I had my sweet daughter helping and that was fun for all of two minutes. Then, it became a large mess. I still like the idea of making her a part of all the fun projects I'm doing but I will do it outside next time:) Anyway, you begin with just water and flour. Keep mixing until it's at the consistency you are comfortable with. You want it to be thick but not too thick because it will be smooth and go further if it's more liquid-like and not paste-like. Choose a ballon for the base form. A balloon is nice to use because you just pop it when everything is dry and hard.


Don't worry if your base form doesn't look like the final product. It's easy to add features later to create your final masterpiece. After it is dry, it's time to add the tissue paper. Tissue paper is so cheap and so far I've just used recycled newspaper and flour which I had at the house. I even used the tissue paper I had leftover after a gift wrap. Christopher brought home one more pack of yellow (body color) which was $1.00. Pretty good deal for a one-of-a-kind pinata. Once you have decided the body design and what colors you will use it's simple. Cut the tissue paper into smaller squares and scrunch them one at a time and glue onto the form. This seems like such a long process but I promise it goes by fast. I used good ole Elmer's glue which worked great. Relax on the couch after you put the kiddos to bed and watch some saved up DVR shows while you finish glue the pieces on. I don't even think it took one glass of wine's time. hehe Like my time measurement?

Once the tissue paper is on, it really looks awesome. Then, you just add the extra parts with paper or in my case, the wings were paper bags covered with the tissue paper. For the top, we just drilled (when I say we, I really mean my wonderful hubby, Christopher) two holes in the top and thread some black string through. I used one of those curved needles but I'm sure you could use any wire you have around the house. Then, the fun part is deciding what you want to put in it. My Mom really wanted to stuff the pinata for her granddaughter so she went to the dollar store with us and was kind enough to pick up the bill. We brought all the goodies home and Bella was excited to help us stuff as well. It was a fun time had by all.
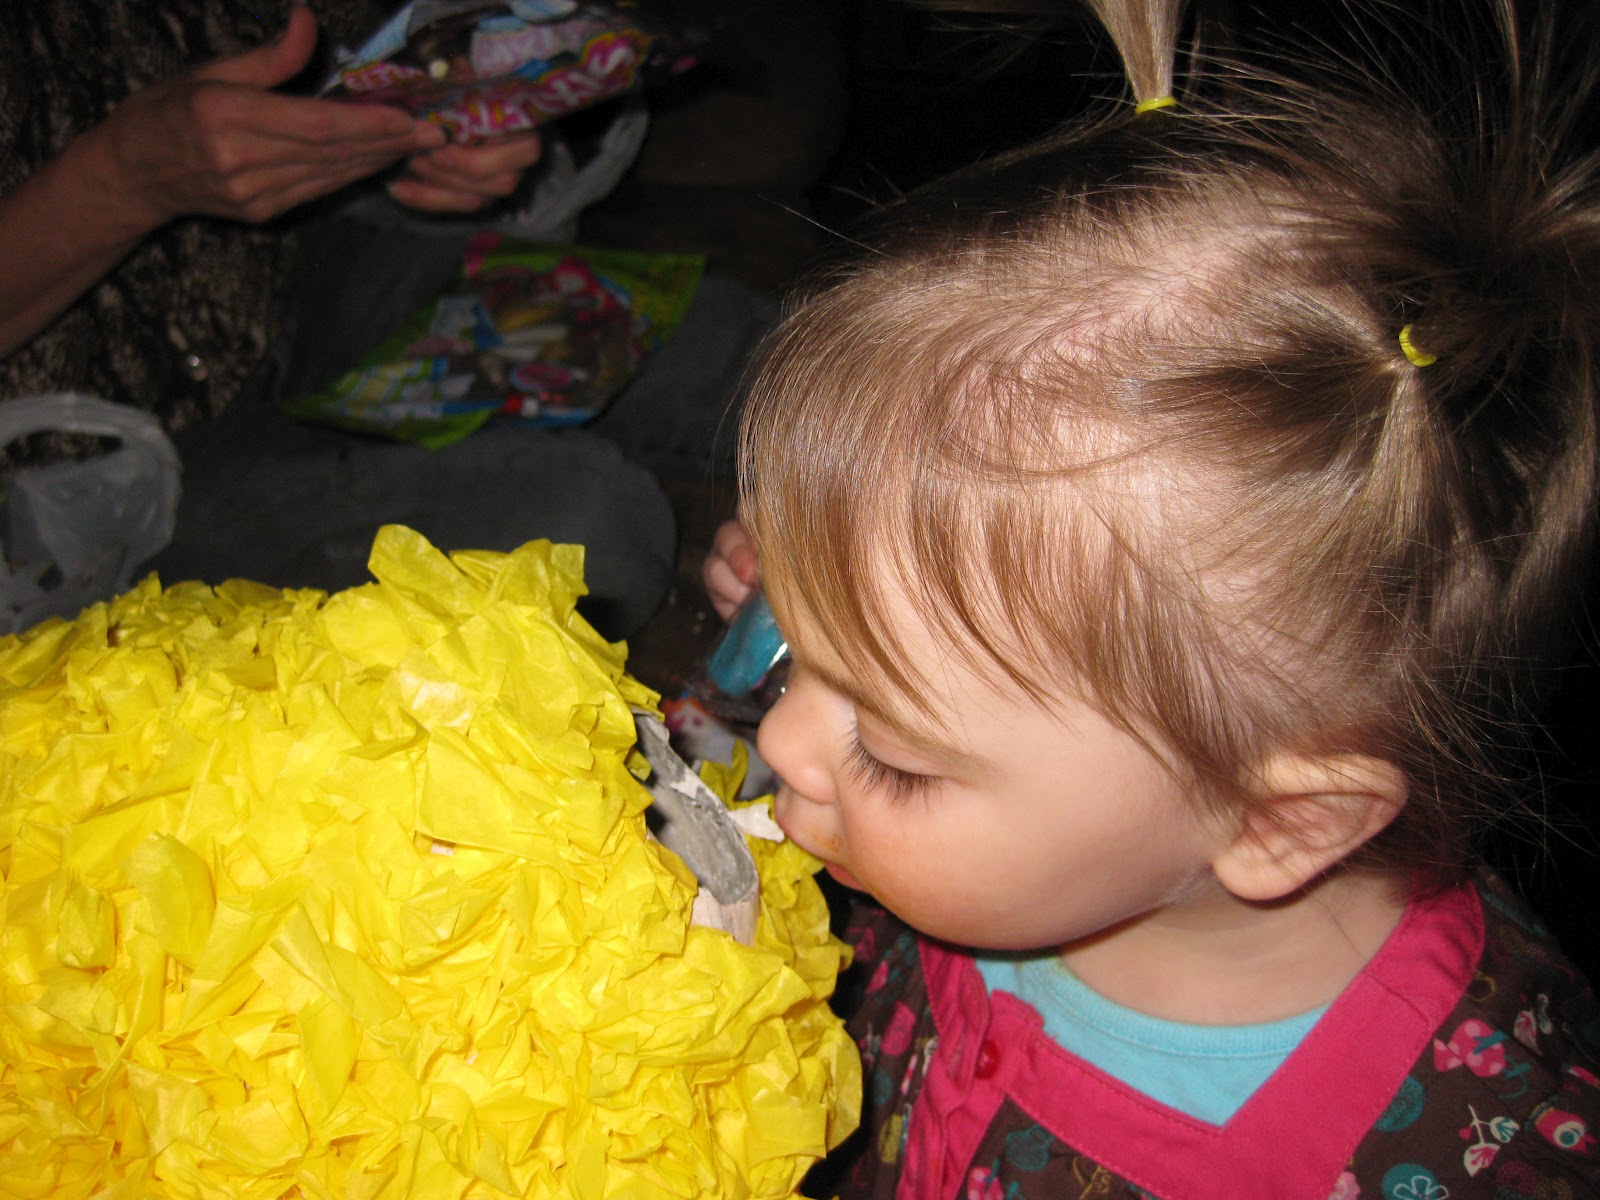


Don't get stuck in a "candy only" rutt either. Don't be afraid to get creative. We put pencils in there, toy watches, balls, etc. To close it up, I cut a piece of that recycled brown paper bag and glued it really well from the inside. It was really heavy after filled so be sure to secure the opening well. Then, cover it with tissue paper to keep it secure. Check out the final product!

It was quite a hardy pinata too. The two year olds couldn't bust it. My cousin's little girl knocked it down but I still had to pull it apart:) We were using a plasstic bat. May need to use a wooden bat next time:)
Alright, we have the pinata and we know wonderful things will be coming out of it but how will the kids collect it? Should I use the plastic party bags from the store? No, cheapo here designed her own brown paper lunch sacks (had at home already = free) and made it again part of the theme.
I HAD A HOOT AND GOT SOME LOOT AT BELLA'S 2ND BIRTHDAY

The best part of all this party planning is not only that is was cheap and fun but I was able to make it all ahead of time and just show up the day of the party ready to have a blast.
Another fun activity to keep all the kids feeling like they are part of the party fun was to make owl hats. This was a fun activity to do for the party and everyone got to wear their own creation too. Everyone looked like an owl that day. It was lots of fun and something else unique to Bella's party. Kids love wearing hats and looking silly so this was perfect for the six two year olds there:)

The concept was easy, foam visors and adhesive foam pieces for easy decorating. They even got to choose their own color hat. Most of the kids were even wearing them home as they left the party. Whoooo doesn't want an owl hat? Hehe I know I'm a dork.
Decorations? DONE
Cake? DONE
Activities? DONE
The last thing I had on my birthday agenda was the birthday girl's fabulous outfit. Bella is only two but for every party she has, I have made a special outfit just for her. I made a shirt with felt that I cut and glued (fabric glue) on and a fabric tutu skirt. The skirt was easy to make. I didn't even have to sew anything. You just take an elastic band and glue it at the appropriate length, cut strips of fabric (I even coordinated her skirt with the owls I made for the party) and tie them in knots around the elastic band. The weekend of the party was quite a bit warmer than it had been leading up to that day. So, I bought a turtle necked shirt which I just altered the night before. Again, it was simple. Just cut the sleeve at the length you like and sew a simple hem around the edge. Top off every outfit with a nice pair of boots and you've got a great party dress:)


We held her party at an ice cream parlor. It was PERFECT for a two year old. They got to pick their own special bowl, ice cream and even yummy toppings. There were six two year olds but honestly they were all sooo sweet and appreciative. Nobody got upset, there were no big fits and everyone was smiling and having fun. I think we kept them too busy and occupied with all the activities and SUGAR:)
I love this Amy. You have found your passion once again. I do feel sorry for the teachers that have Bella for Art class. She's going to be like..."Seriously pinata's? I made those when I was two! Can I do something else?" Who am I kidding, this child isn't going to school, your going to have to home school her she leaps and bounds ahead of most of the kids her age. Actually I am a bit older then Bella and I have never made a pinata! Your awesome parents to teach her all this so young. Is she bi-lingual yet?
ReplyDeleteThis looks great Amy! Good job on !everything
ReplyDelete